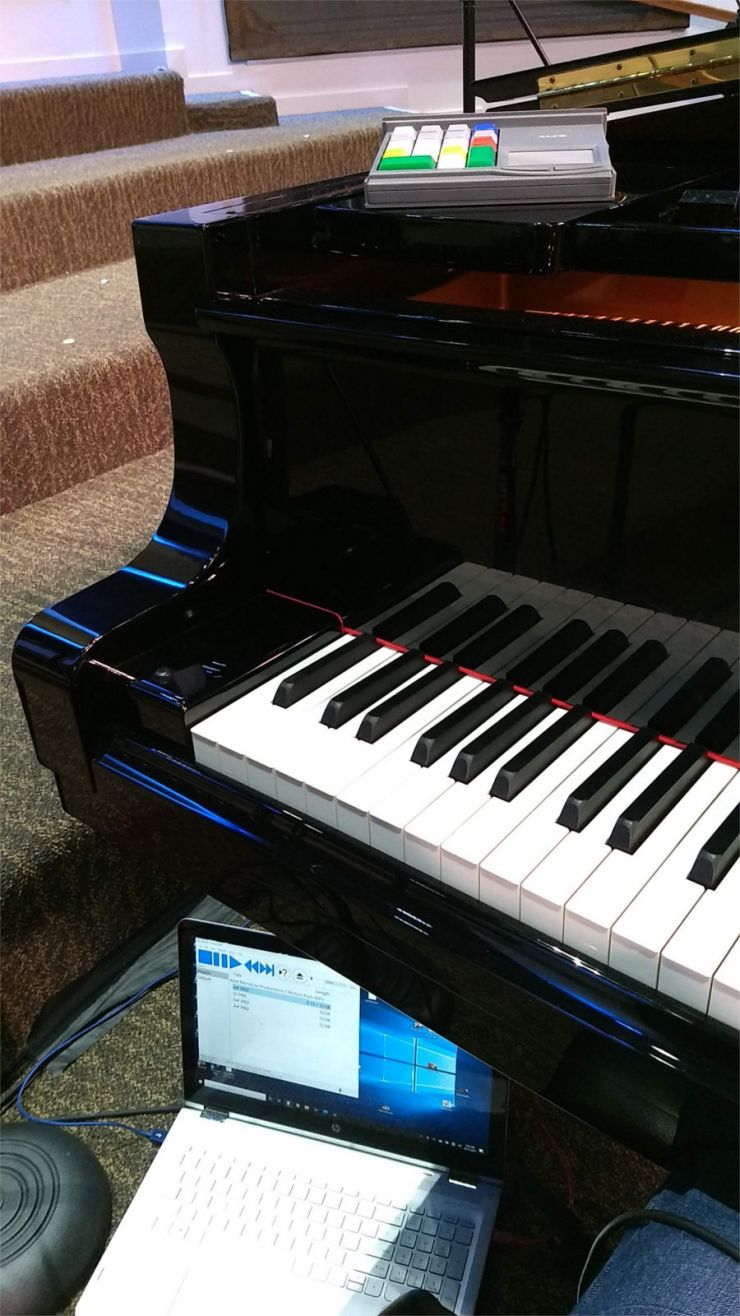
Pre-Note: This is an article about using a small number-pad type keyboard, connected to a laptop which has a keyboard, while sitting at a piano, which also has a keyboard. I have tried to keep my terms from getting confusing, but if in doubt, when I refer to a keyboard, I'm usually talking about the laptop keyboard or the keypad.
I play piano with the band at my church. The music we play is more modern/contemporary, and that style is usually more suited for a musical keyboard/synthesizer instead of piano because that makes it easy to layer strings and pad sounds with what you are playing. But the church has a big beautiful grand piano so it's not like I'm going to not play it when given a chance. In order to add that background chording layer and modern sound, but still enable me to play the piano, we run a chord track in the background. The chord sound is generalized enough that I only need to interact with it to start or stop it, and to change keys between songs.
These background “pad” tracks are standard audio files so technically the only thing needed to play them is a media player plugged into the sound system. I decided to use my Windows 10 laptop as the "engine," which should make it easier to find media player software that would do what we needed. After testing a few programs out, I realized that another critical element I didn't anticipate was the ability to fade in/out/between tracks. It's incredible jarring to instantly switch the background key you are listening to...it's like a record player jumping to a different song. I eventually decided to go with foobar2000 as the media player. It's open source(free), has a lot of unique features other media players don't, and with the "Fade In/Out DSP" module activated, I set up parameters to have a 2 second fade for every track when it is starting, stopping, or changing.
*****
As an aside, if you are following along because you want to do something vaguely similar with a computer and onstage sound, let me say that if you are thinking about using the headphone jack on your laptop, it's possible, but it's not ideal. A quality USB audio interface will give you better quality, make setup more consistent, and if you run intensive music software like Ableton, it can greatly improve system performance by offloading the audio conversion from the laptop processor. Most laptops have "good-enough" audio, but they aren't generally designed for optimum sound or system performance. Even though I only have one channel of sound output, I use a Behringer UMC404HD and I think it's great. Oh, and if you happen to use your laptop, make sure you disable all possible Windows sounds except the media player to keep noises like notifications from dinging into the music. Don't ask me how I know it happens.
*****
After I had the software set up, I had to figure out how to control it and stay centered at the piano at the same time. My laptop is big, which is a drawback in this case. I need the simplest. fastest way to control the interface, so I customized hotkeys in foobar2000 and mapped them to keys I could access easily. The problem is that It's hard to keep anything the size of a laptop within arm's reach when you're sitting at a piano. I found places to balance it but the stage is a busy place and I was always scared it would take a fall. Even though navigating the media player tracks with the laptop keys worked pretty well, it was hard to be sure I was going to hit the right key when the stage lights would go down. The laptop keys are backlit, but my hands are not, and it was sometimes hard to see exactly where my finger was going to make contact. I thought about trying to use a wireless mouse or external number pad but didn't like the limitations of either on their own. So keeping the laptop nearby and using it's keyboard was the way I ran the system for a while.

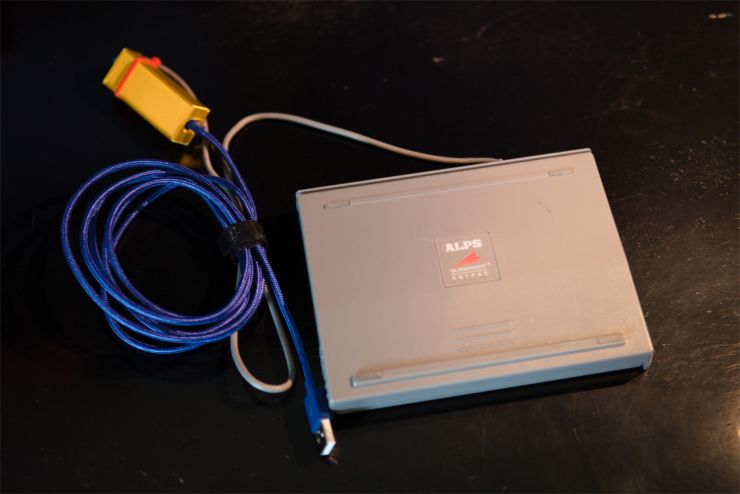
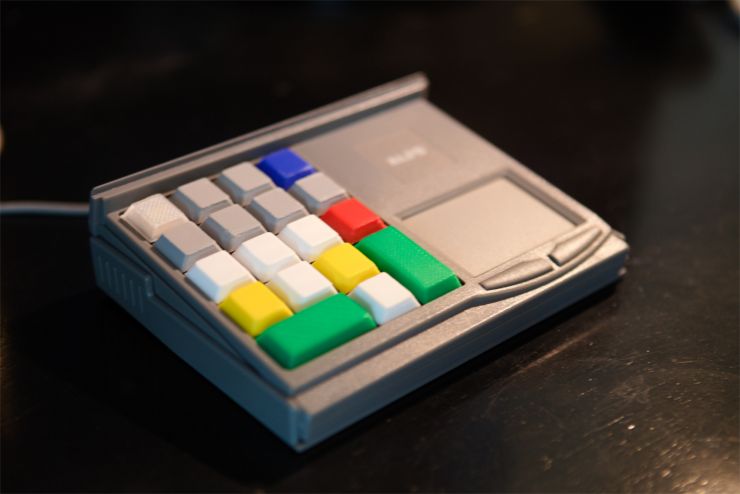
Changing topics a little, a good friend of mine at work turned me on to the joys of mechanical computer keyboards, particularly vintage boards with ALPS keyswitches. (ALPS made components for keyboards, and had some especially good ones in the 80s and 90s). One day while googling around for ALPS keyboards, I found a quirky little ALPS keypad that was perfect for my needs: the ALPS Glidepoint Keypad. It is a numpad that has about 17 usable keys and a built in touchpad. The cable was several feet long so I could locate the computer away from my seat(somewhere stable) and just keep the small controller near me. I could map the numpad keys as control buttons since foobar2000 is pretty flexible with assigning hotkeys, and the touchpad meant I basically had mouse control when I needed it as well. On top of these features, the physical design itself was also great. The unit was meant to be portable, so It has a cover that protects the keys when traveling, then flips around to become an angled stand to support the unit, and has rubber feet that would protect the piano finish. There was an issue however. This was a vintage piece of electronics from the 90’s, and it was for ADB (Apple Desktop Bus), a connection type used on apple and macintosh systems in the 80s and 90s. There was no direct way to hook it up to my laptop. ADB to USB converters exist, but they start at $30.

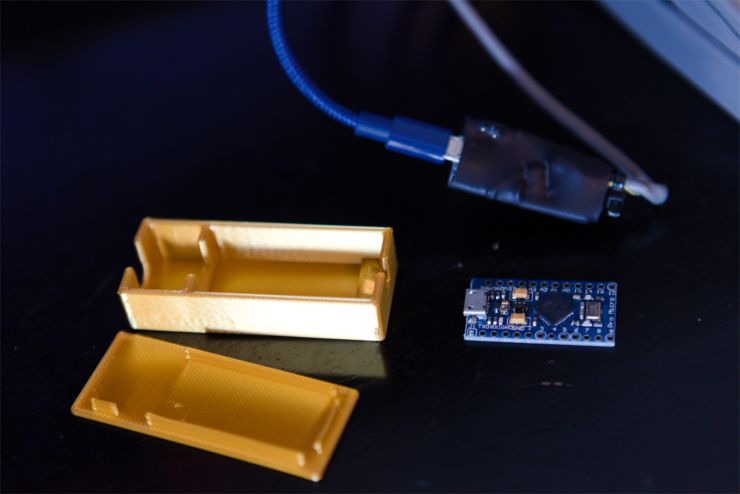
Things get a little nerdy now. Fortunately, I had worked with other ALPS boards (never ADB though). Since their best products are vintage, they don't just plug into modern PCs either. For the other keyboards, I built a USB converter using a Pro Micro / Arduino Leonardo. (For anyone not familiar with arduino’s, they are basically super small, super basic computers that make it simple for tinkerers to control electronics. They make great converters for old equipment because as tiny computers, they can easily be programmed as translators. The old equipment can speak it’s native old language, the newer equipment can speak its native new language, and the arduino just translates between the two.) The converter software is called TMK Keyboard and it is compatible with a lot of old keyboard controllers. I did a little research to confirm that it handled ADB devices (including both keyboards and touchpads.) Based on what I saw, I was pretty sure I could make it work, so I bought the device off ebay, new and still wrapped (but about 25 years late) for $30.
The next step was building the converter. I'm not going to go into great detail about building and setting it up because
- I did it a while ago and didn't document everything : (
- If you want to recreate what I did here, either you are
- experienced with Arduinos and compiling firmwares and don't need me to hold your hand,
or - You are NOT experienced with these things, in which case, this project is probably not the best place to get a crash course. Keyboard converters can be flaky to get right.
- experienced with Arduinos and compiling firmwares and don't need me to hold your hand,
(In any case, I'm happy to help how I can or give pointers if you want to ask questions.)
At a super high level, this was the process to convert the keypad into a USB compatible device.
- download the TMK Keyboard source code and set up a programming environment. (I tried using CygWin, but kept having problems compiling. I ended up working inside an Ubuntu VM on VirtualBox and everything went smoothly)
- Cut off the ADB connector and strip back the cable wires a little
- Solder the wires to the proper pins/holes on the arduino. General instructions are in the TMK documentation.
- solder a pull-up resistor across a couple of contacts on the arduino
- tweak a few settings in the source code
- compile the new firmware and upload it into the arduino

After I had done these things, the numpad could now be connected to basically any device as a USB compatible combination numpad AND touchpad. I put on some heat shrink tubing to protect the Pro Micro, and designed a basic enclosure to further protect it(it gets thrown around a bit) and it was basically ready to go. For my own personal extra credit, I designed 3D models for replacement keys that would fit on the ALPS keyswitches and printed some in different colors to make it easier to distinguish them in the dark. The last step was simply to plug it into my laptop and set up some controls. At first I thought I might have to use some fancy key-mapping software, but fortunately foobar2000 has some great keyboard shortcut assignment tools. I was able to assign the numpad keys for the main features I needed (Start/Stop, Prev Track, Next Track, Mute the Track, Mute the whole PC (in case of a Windows-freakout-emergency...it can happen...)). That was the last step, and this is the setup I use all the time now.
Thus concludes the tale of my weird little custom keypad. It lets me put my computer somewhere stable, and drive it while I'm sitting at a piano. I just have to tap brightly colored keys on a little input device that sits nearby (and I can use the mouse to navigate to other stuff when I need to venture outside of the main process flow). Let this be an encouragement that if you have hobbies or projects you like doing, never be afraid to try new things or learn new techniques. I never would have found the numpad in the first place if I hadn't taken an interest in vintage ALPS keyboards. And I never would have considered trying to modify a macintosh device into a USB device if I hadn't already done a similar (simpler) conversion project for another keyboard. You never know when a seemingly small step will open a big door later on.